Hi! For integrate GFCalendar with Google Calendar you need to go in google console.
![](http://gfcalendar.com/wp-content/uploads/2021/06/image-1.png)
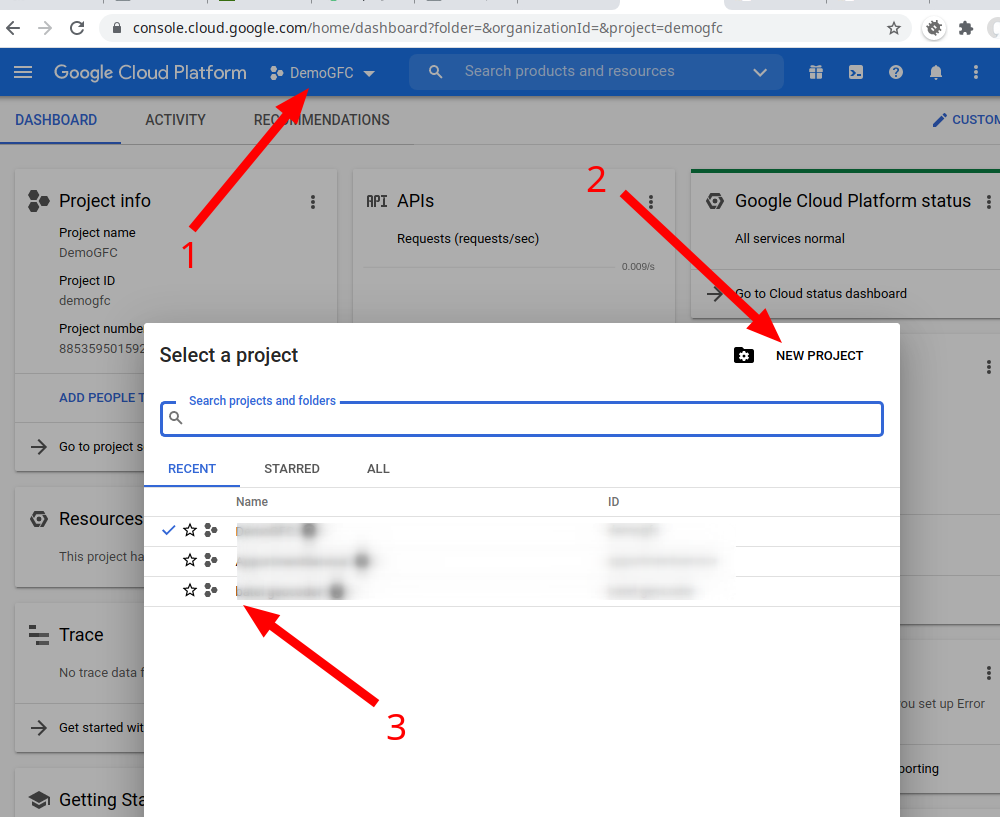
Here you can select already exist projcect (cleck to 3) or create new project (click 1 and 2).
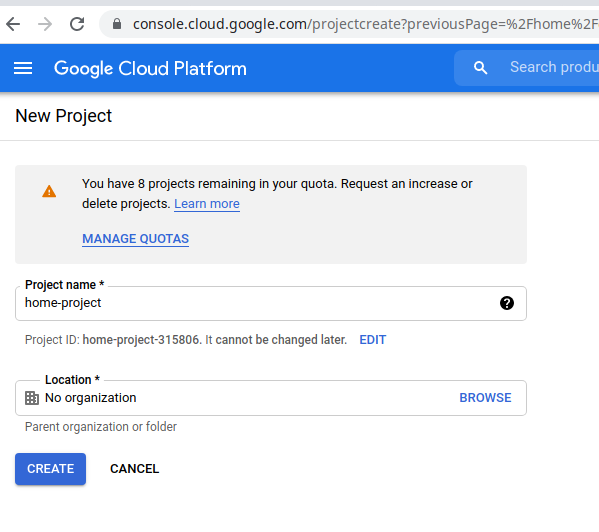
Now we will create integration via New project. Click to New Project button and set name for it.
![](http://gfcalendar.com/wp-content/uploads/2021/06/image-2.png)
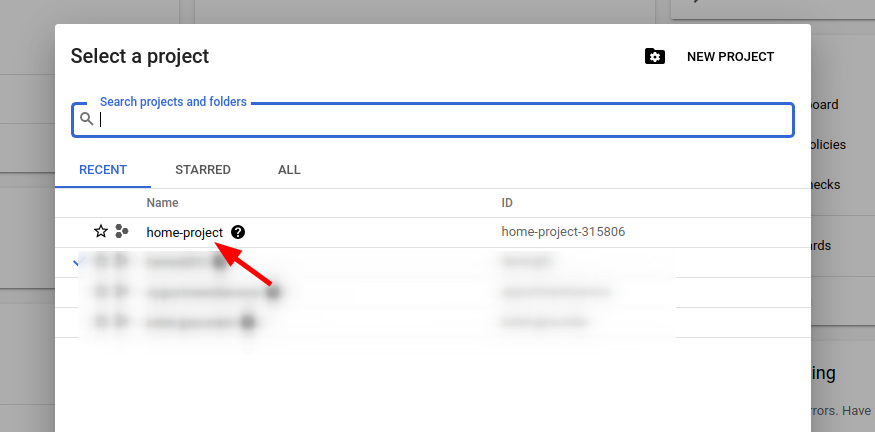
After create you need select it from Projects list.
![](http://gfcalendar.com/wp-content/uploads/2021/06/image-3.png)
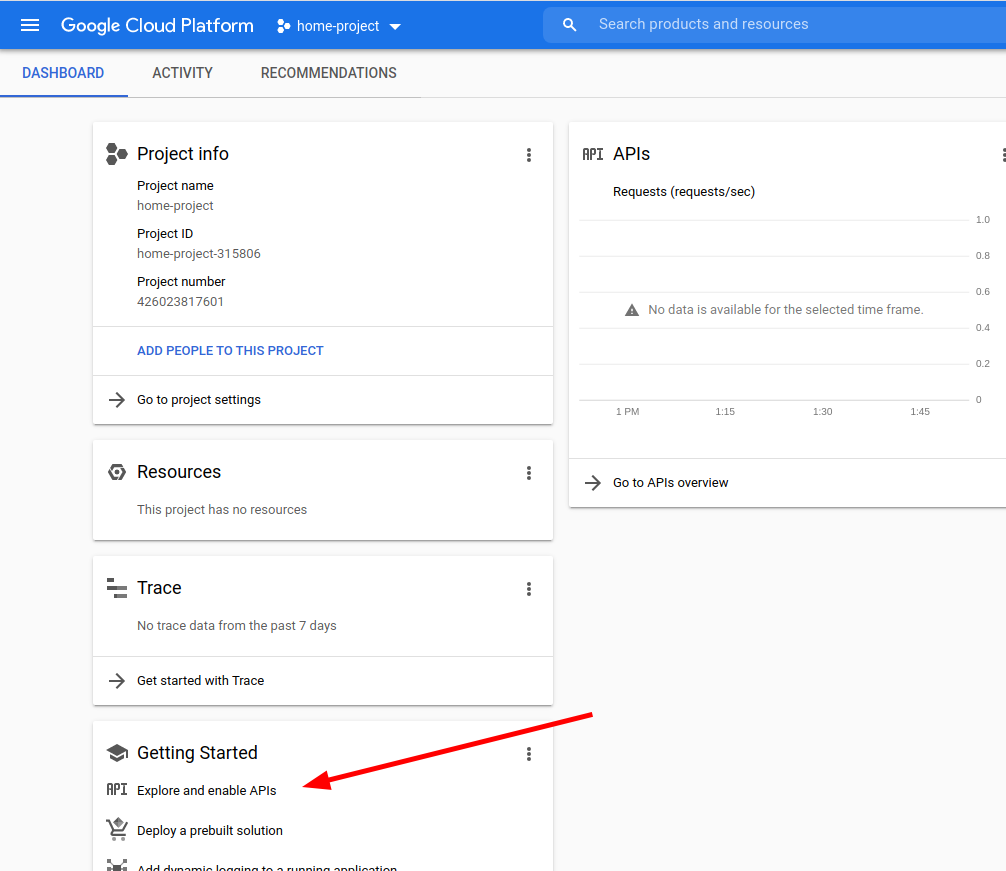
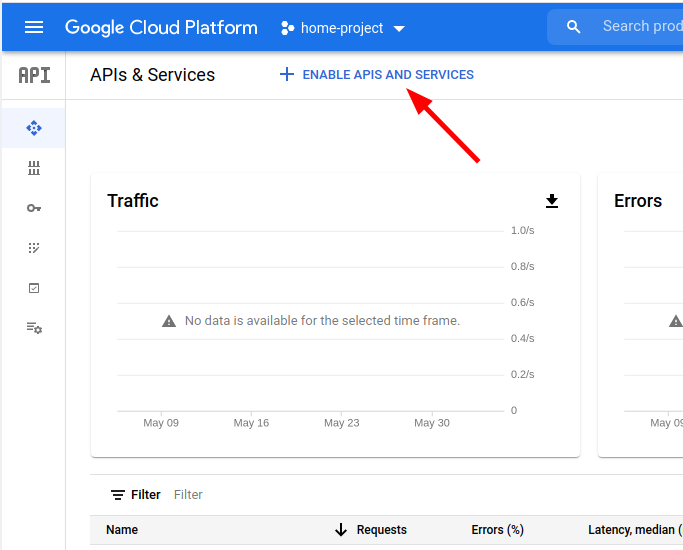
Here select Explore and enable API.
![](http://gfcalendar.com/wp-content/uploads/2021/06/image-4.png)
Then click to Enamble API and Services.
![](http://gfcalendar.com/wp-content/uploads/2021/06/image-5.png)
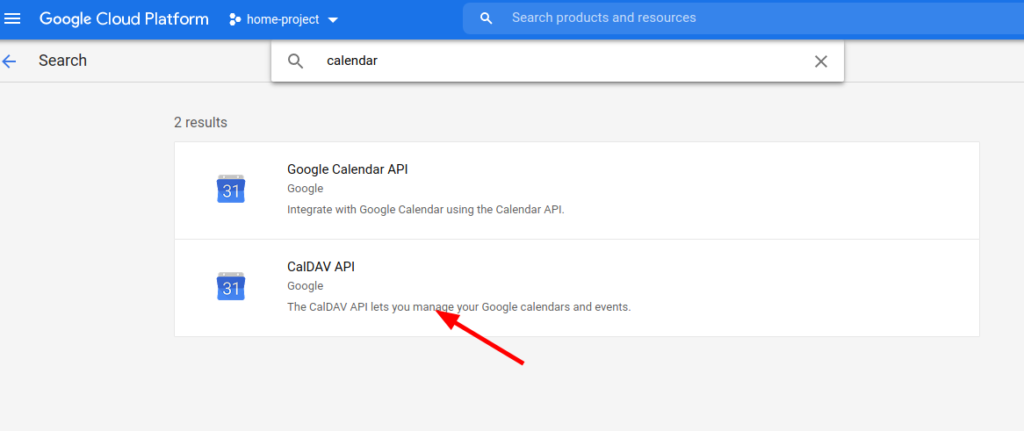
Search CalDAV API and select it.
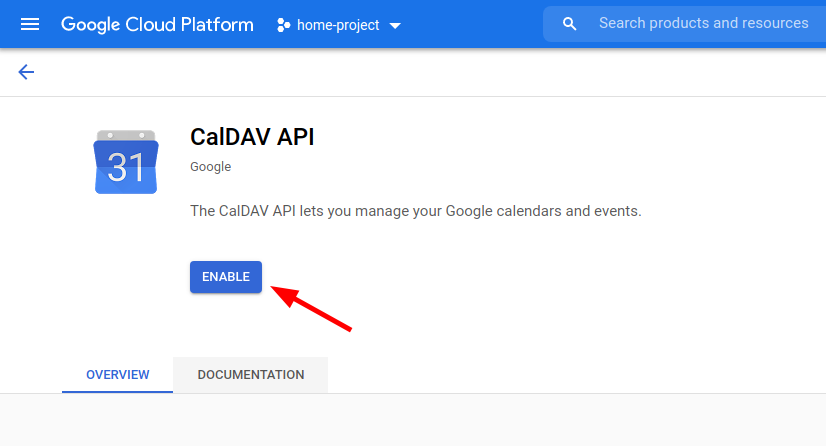
![](http://gfcalendar.com/wp-content/uploads/2021/06/image-6-1024x431.png)
and enable it
![](http://gfcalendar.com/wp-content/uploads/2021/06/image-7.png)
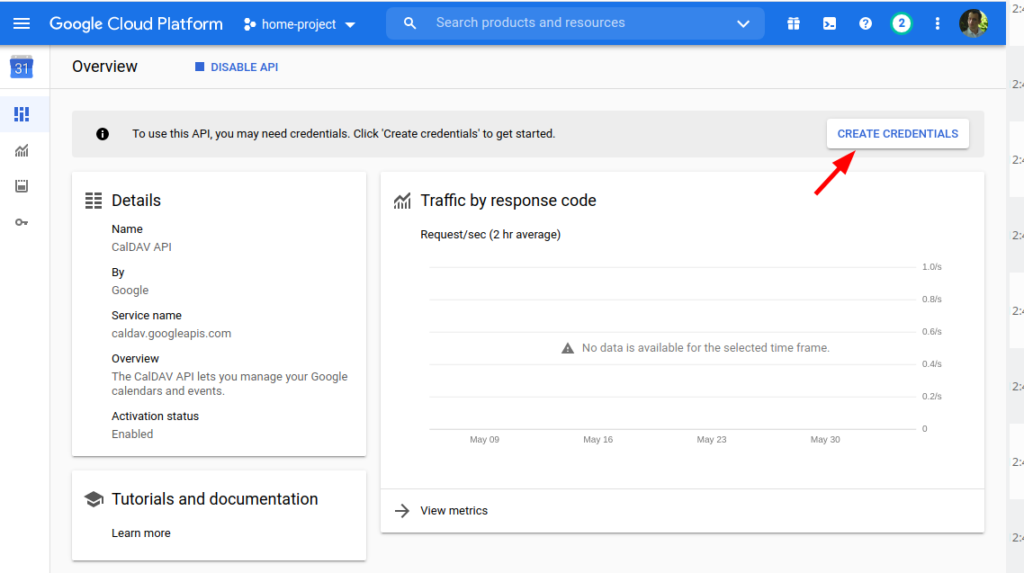
Now Google Calendar API has been enabled and you redirect to page for create Credentials.
![](http://gfcalendar.com/wp-content/uploads/2021/06/image-8-1024x573.png)
![](http://gfcalendar.com/wp-content/uploads/2021/06/image-9.png)
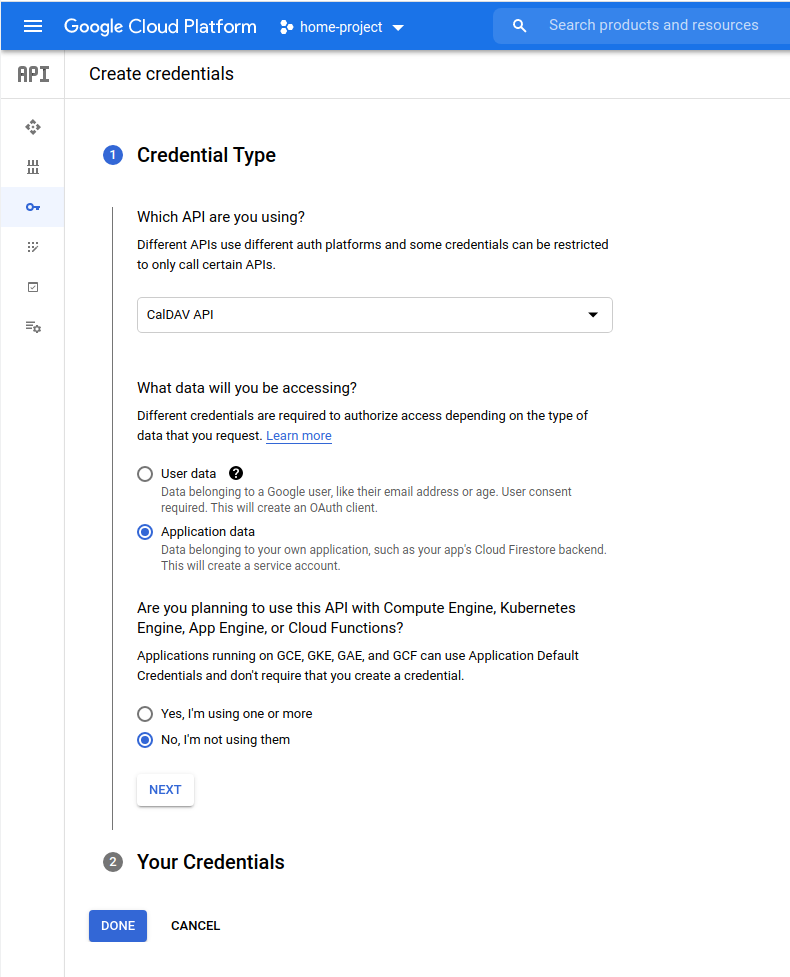
After set Credential Type click Done button.
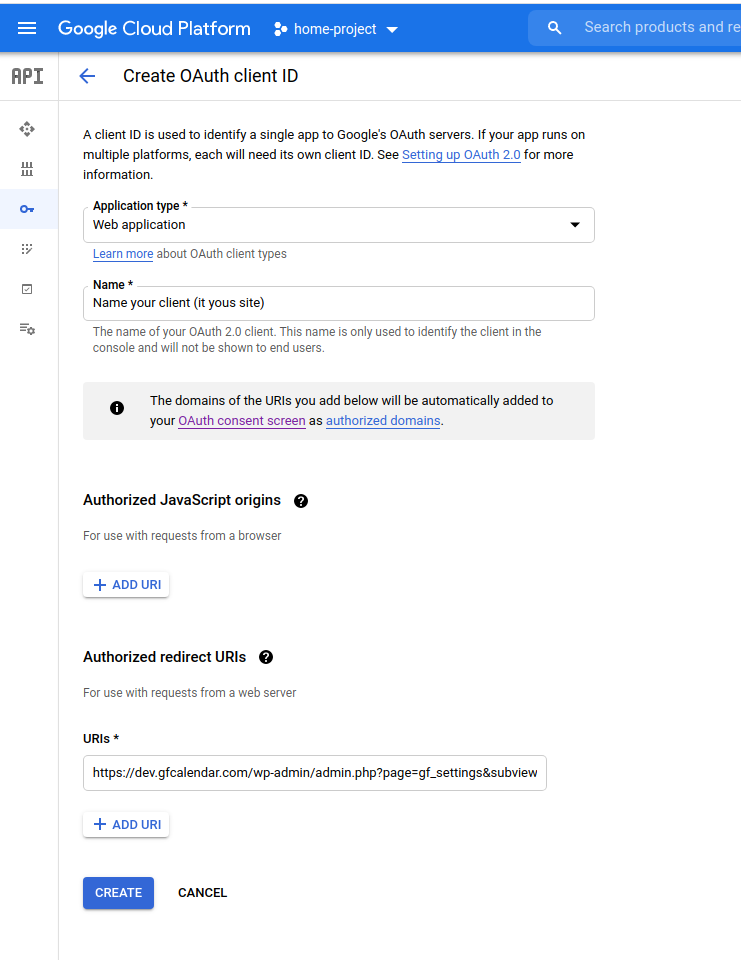
GFCalendar work via OAuth client ID and new we create access to it.
![](http://gfcalendar.com/wp-content/uploads/2021/06/image-11.png)
![](http://gfcalendar.com/wp-content/uploads/2021/06/image-12-1024x365.png)
![](http://gfcalendar.com/wp-content/uploads/2021/06/image-13.png)
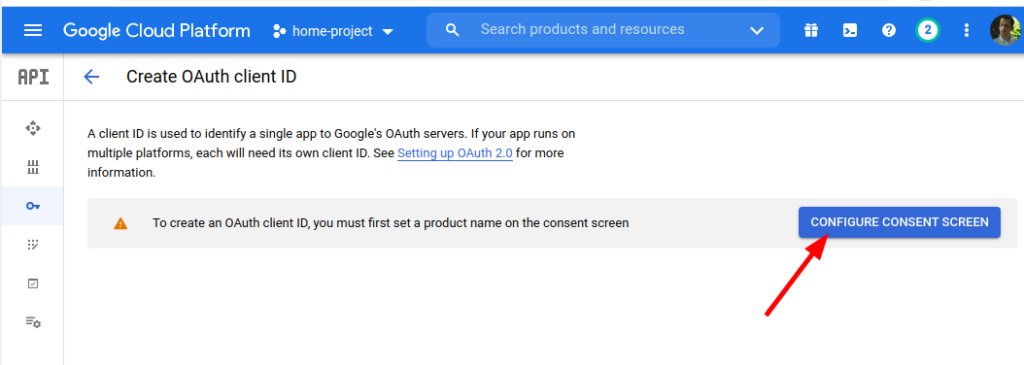
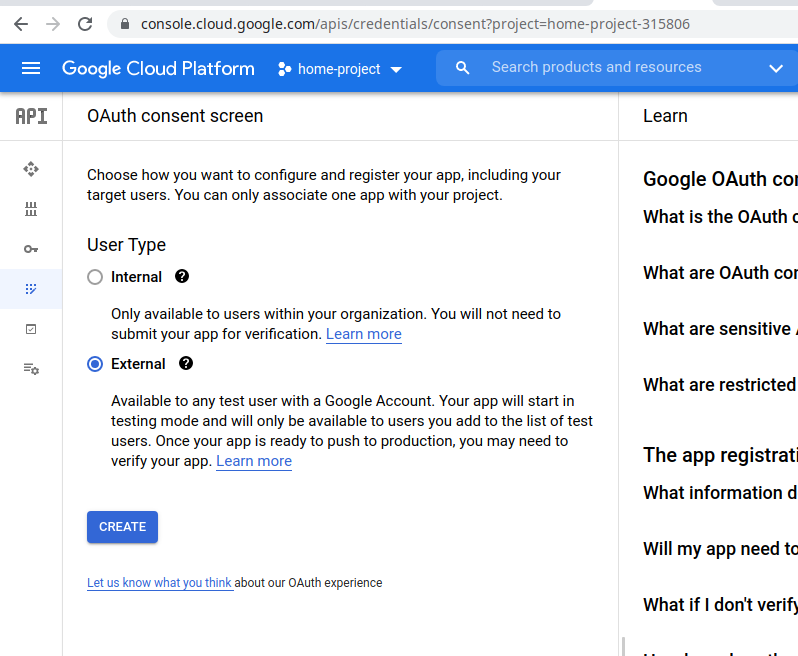
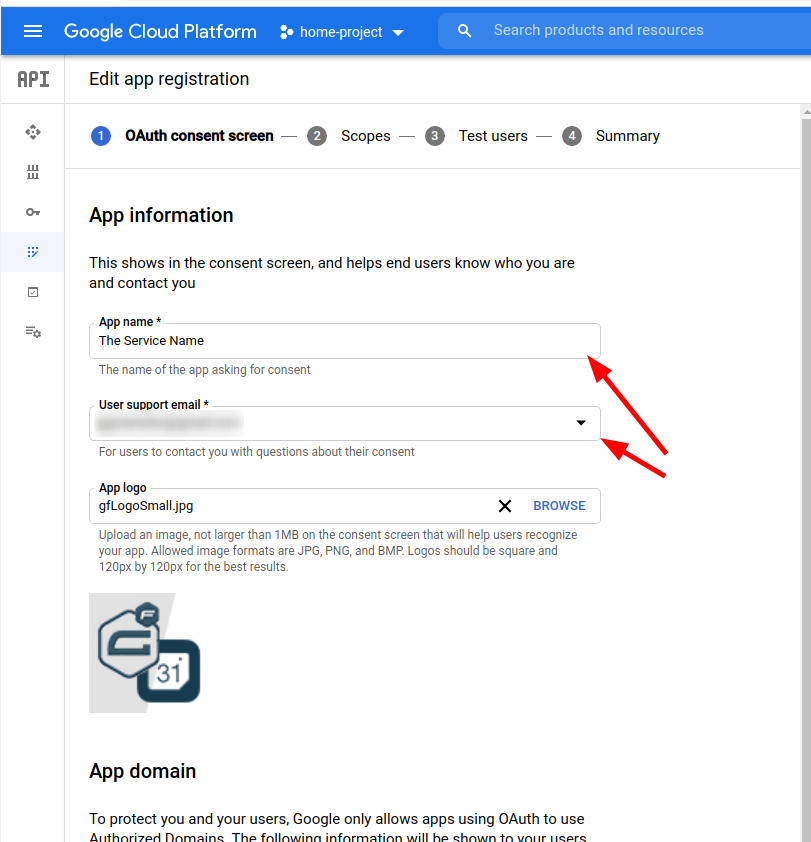
Now need to populate you service start page for integrate your service with Google.
![](http://gfcalendar.com/wp-content/uploads/2021/06/image-14.png)
![](http://gfcalendar.com/wp-content/uploads/2021/06/image-15.png)
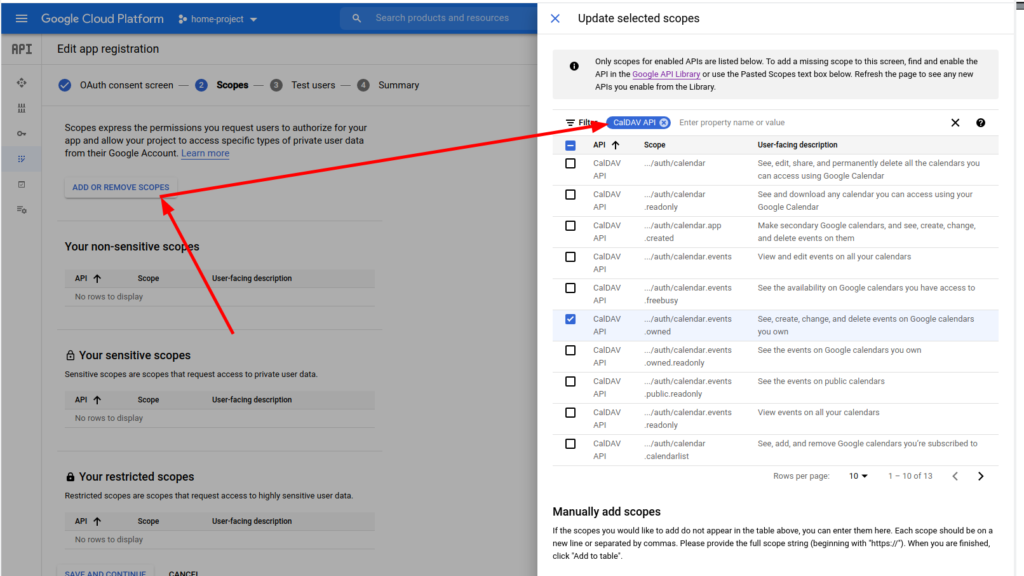
Add or remove scopes and click Update button.
![](http://gfcalendar.com/wp-content/uploads/2021/06/image-16-1024x576.png)
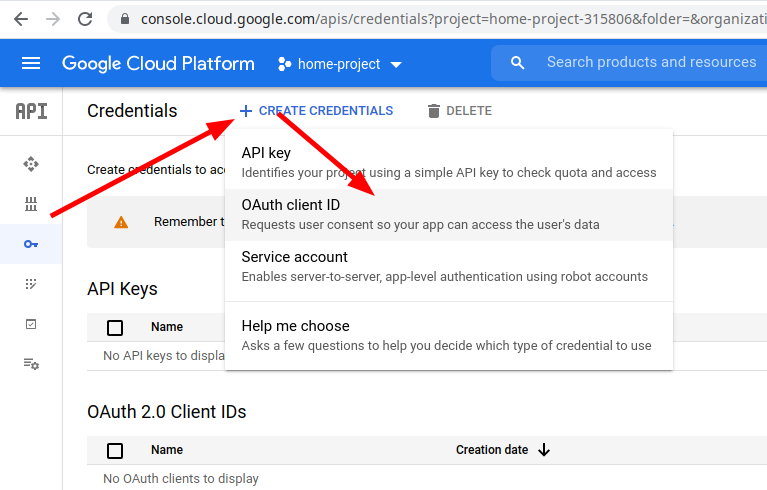
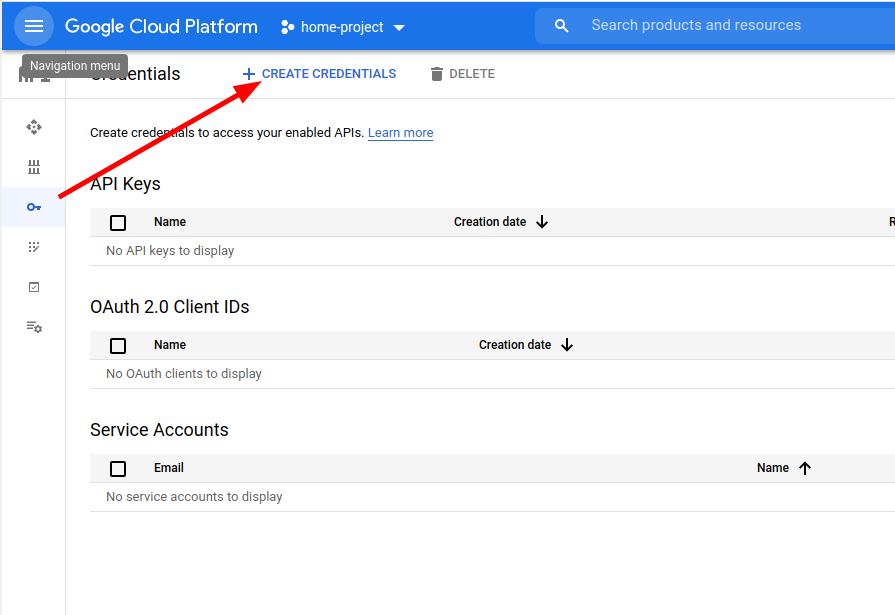
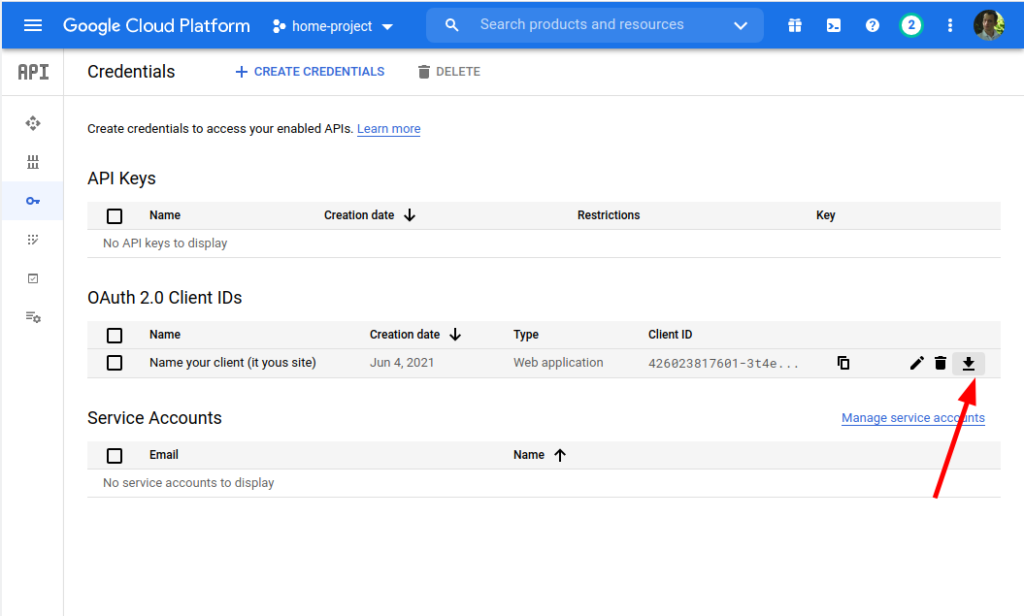
Now we got to dashboard and select item Credentials. How you can see her empty OAuth tockens. So do it.
![](http://gfcalendar.com/wp-content/uploads/2021/06/image-17.png)
Redirect URL you get in settings page of plugin. Copy it.
![](http://gfcalendar.com/wp-content/uploads/2021/06/image-18-1024x445.png)
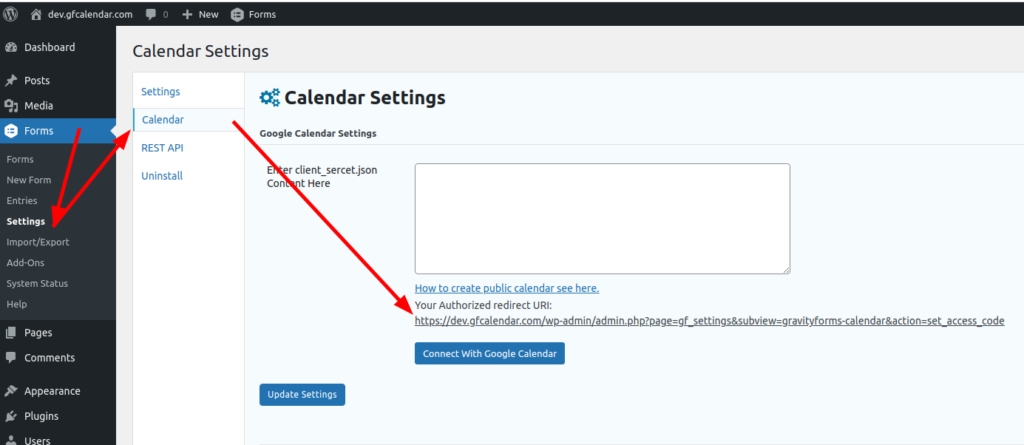
Set name and set Authorized redirect URIs.
![](http://gfcalendar.com/wp-content/uploads/2021/06/image-19.png)
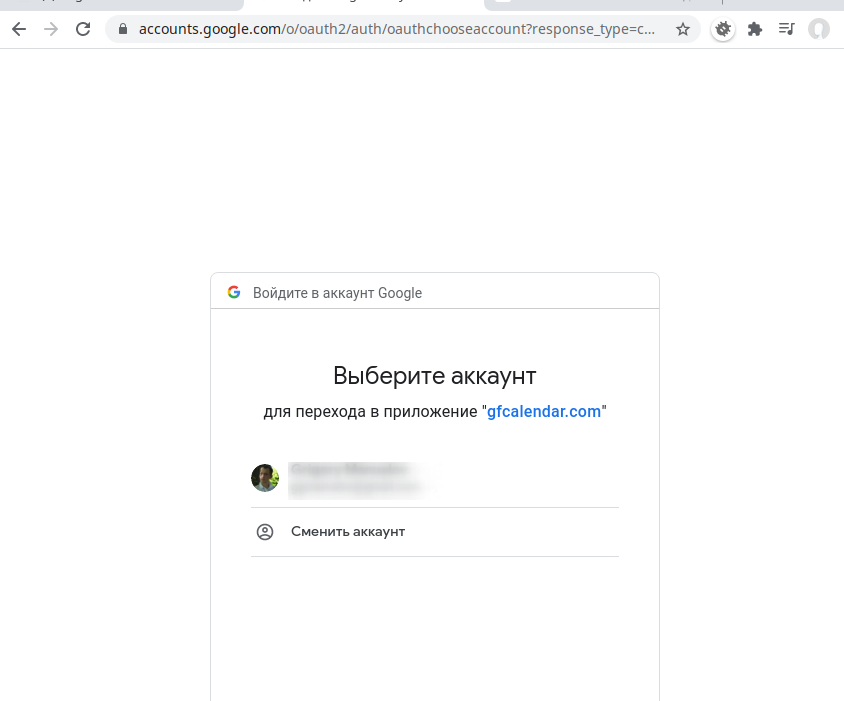
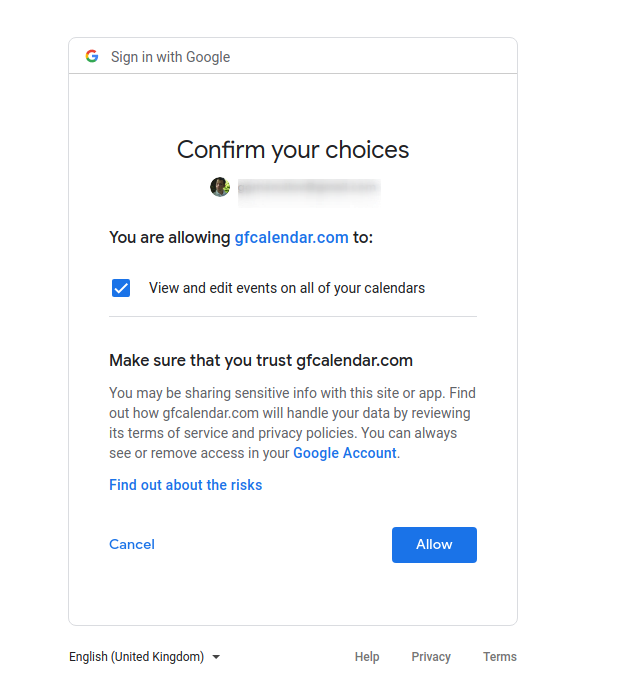
After success get OAuth token Google will redirect you to your site.
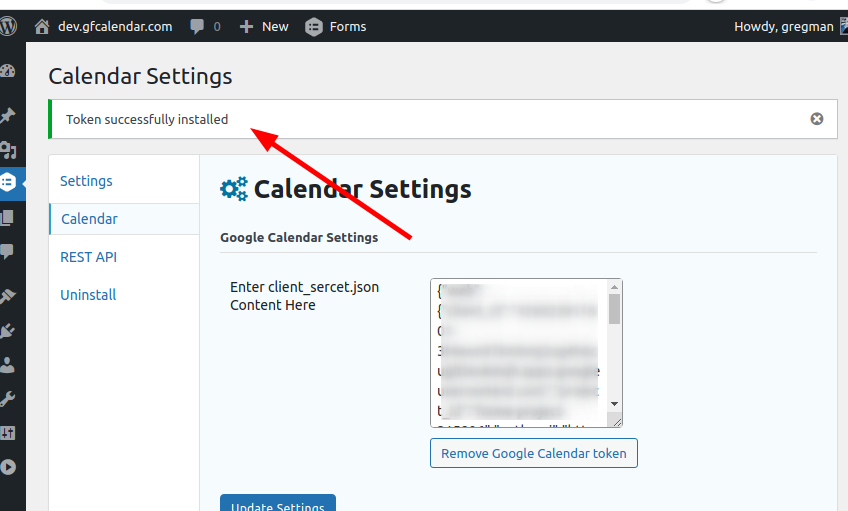
And now get content token:
![](http://gfcalendar.com/wp-content/uploads/2021/06/image-20-1024x616.png)
and copy content of the file to plugin settings here:
![](http://gfcalendar.com/wp-content/uploads/2021/06/image-21.png)
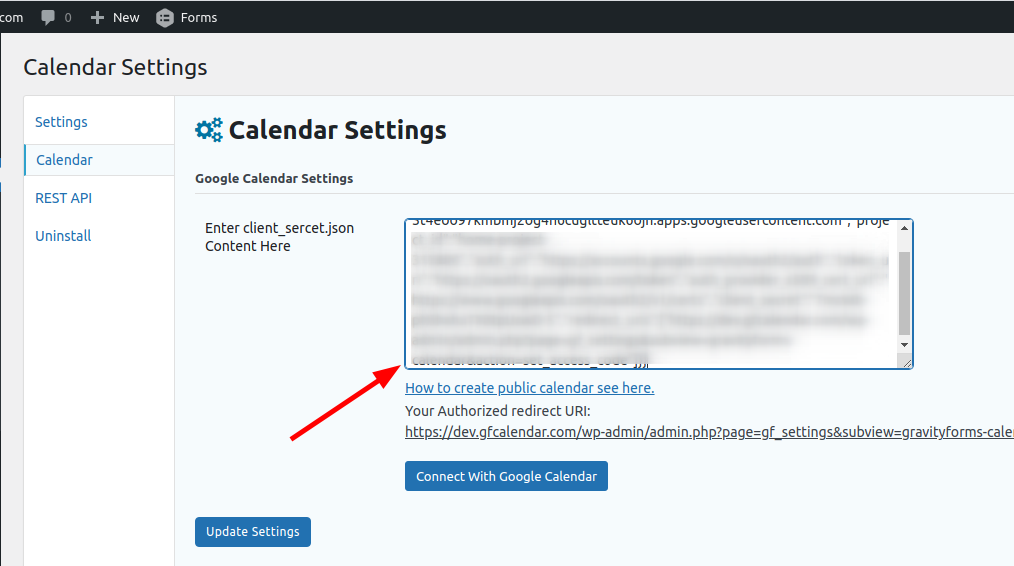
Update Settings before after Click Connect With Google Calendar.
![](http://gfcalendar.com/wp-content/uploads/2021/06/image-22.png)
![](http://gfcalendar.com/wp-content/uploads/2021/06/image-24.png)
![](http://gfcalendar.com/wp-content/uploads/2021/06/image-25.png)
You can found details Google developers.
Good luck!
Great content! Keep up the good work!